FEED configuration
To access the FEED interface, open a web browser and visit the site using {IP}:{port}.
Unless otherwise specified in the Docker Compose, FEED responds on port 9191.
System setup
Since configuring FEED requires knowledge of specific PACS parameters, it is recommended to complete the PACS configuration first.
When accessing the system for the first time, a setup page is automatically displayed, requiring a username and password for privileged login, and allowing adjustments to some pre-filled fields, such as FEED AE Title, folders for storing studies, temporary files, and study disposal, and ports for DICOM, Worklist and HTTP communications.
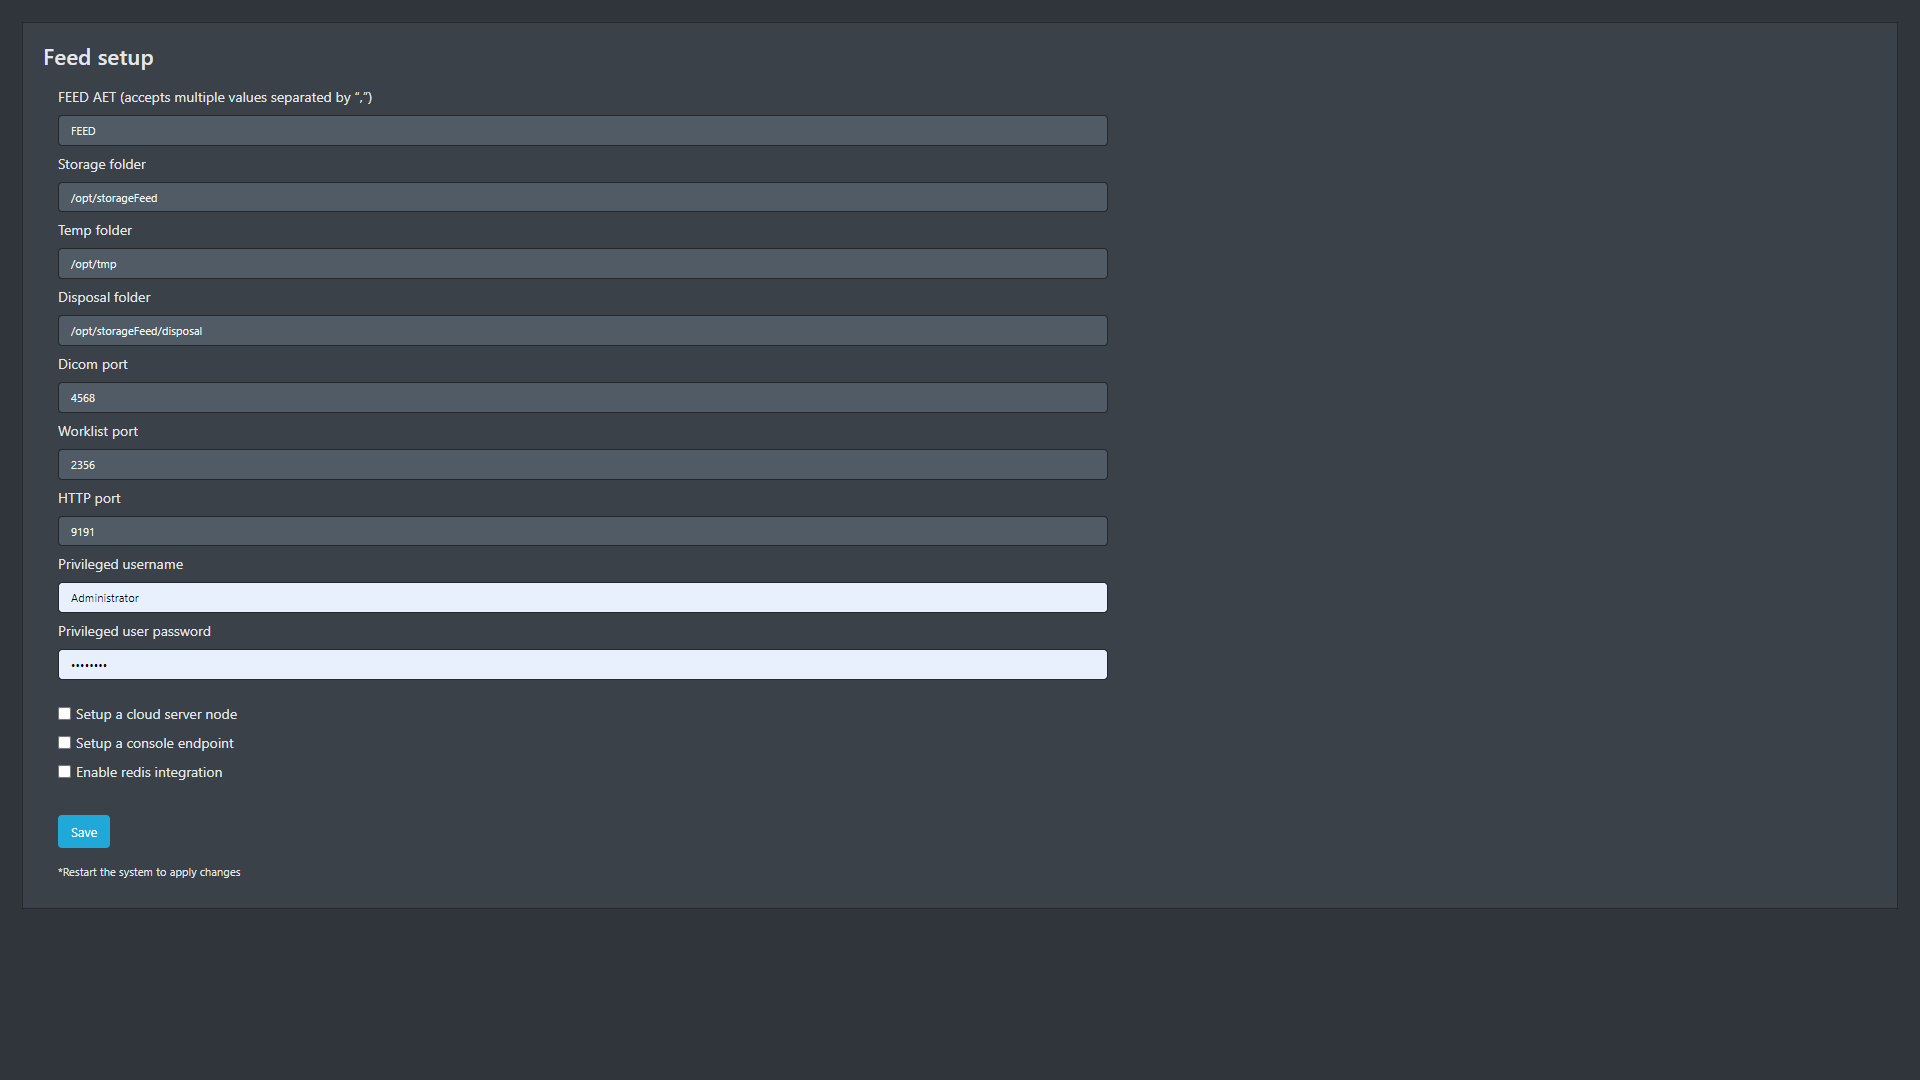
FEED setup page
In scenarios where FEED acts as middleware, forwarding exams received from DICOM modalities to the PACS system, enable the “Setup a cloud server node” option. Then update the “Cloud server” field with the PACS hostname and add the PACS authentication header.
The PACS authorization header can be found in the “Configurations” area of the PACS system, under the “Settings” and “API Key” sections respectively. Please note that the API Key will only be visible at the time of its creation.
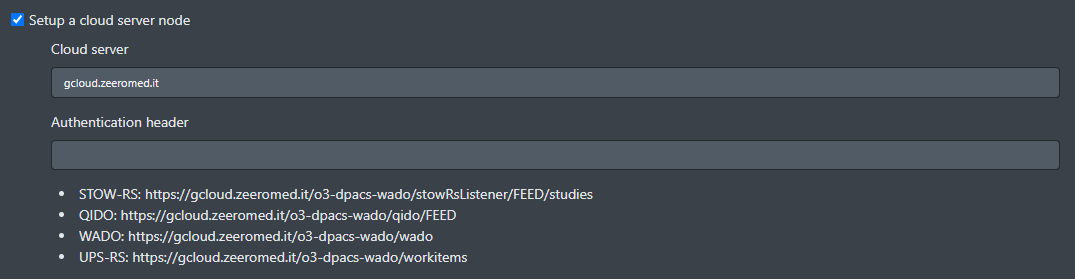
Setting up a cloud server node
This setup will automatically enable the special SYS_PR0XY node, used by the system for DICOMweb requests to the central PACS, and populate the service endpoints (STOW-RS, QIDO, WADO, UPS-RS) with the provided hostname.
After saving the setup, log in to the system using the credentials just created.
Set up exams forwarding to the PACS
To enable the forwarding of exams to the PACS, ensure that the FEED node is added to the PACS system.
Details on how to configure new DICOM nodes on PACS are available at PACS configuration | Adding-a-DICOM-node.
The FEED AE Title set during the initial setup can also be retrieved from the FEED “Configurations” page under the “DICOM Services Configurations” section.
Adding DICOM modalities
To enable DICOM modalities to send acquired exams to FEED, their corresponding DICOM node must be added to the FEED system.
The simplest way to add a DICOM node is to enable it after its first attempt to establish an association with the FEED (e.g., by performing a DICOM Echo). In the “Unknown nodes” list of the “Nodes” page, click the “Enable” button next to the node to be added and specify its port in the popup that appears.
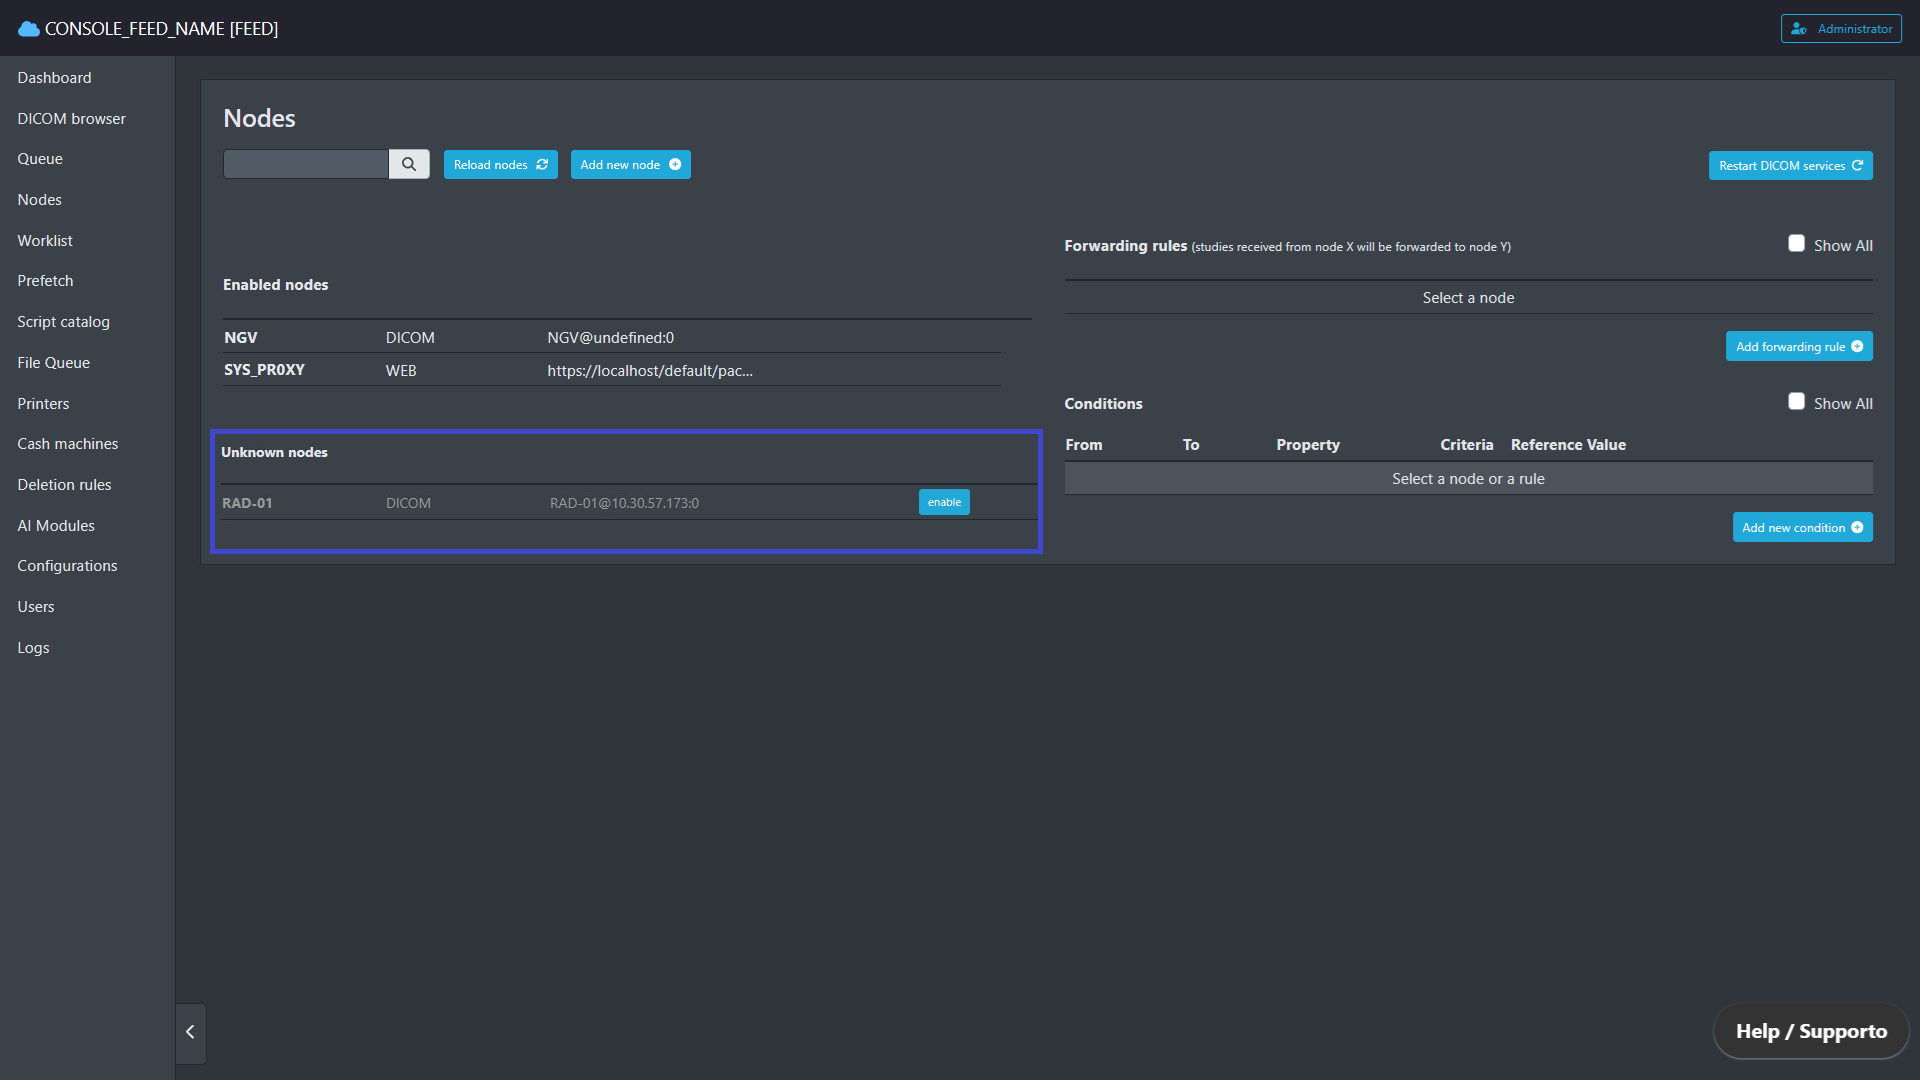
“Unkown nodes” list
Alternatively, a DICOM node can be added manually.
In the “Nodes” page click the “Add new button”. Then insert the AE Title, set the protocol type to DICOM, and input the IP address and port of the DICOM node.
To automatically forward exams received from this DICOM node to the PACS system, select SYS_PR0XY in the “Forward to” dropdown menu.
After completing the above steps, click the “Save Changes” button and then click the “Restart DICOM service” button at the top right corner of the “Nodes” page to apply the changes.
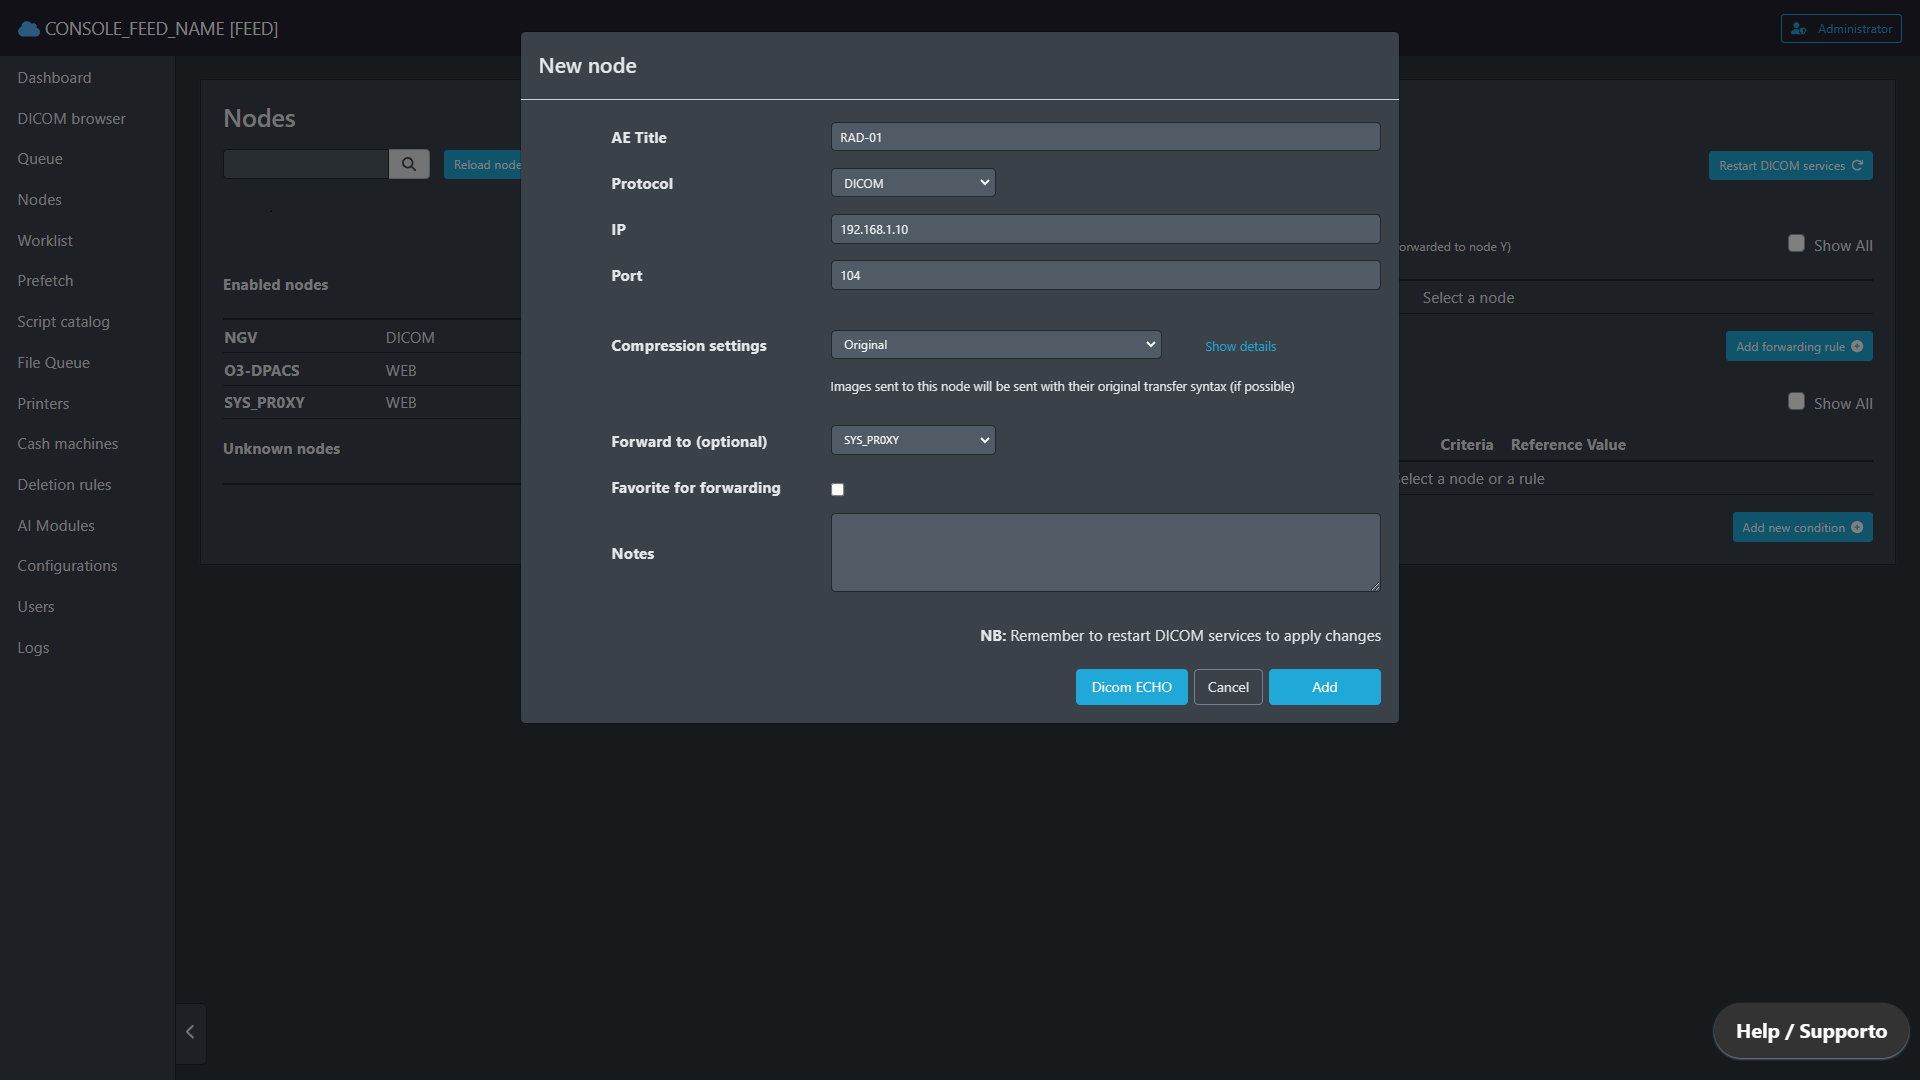
“New node” popup
Configuring a forwarding rule
Each node within the FEED system can be set up with forwarding rules, that allow for the direct routing of exams from one node to another.
To add a new forwarding rule, click the “Add forwarding rule” button on the “Nodes” page and specify the source and destination nodes. If necessary, define a time window during which the forwarding rule should be applied (otherwise, the rule will always be active). Additionally, there is the possibility to customize the name of the queue associated with the forwarding rule, which will be searchable on the “Queue” page.
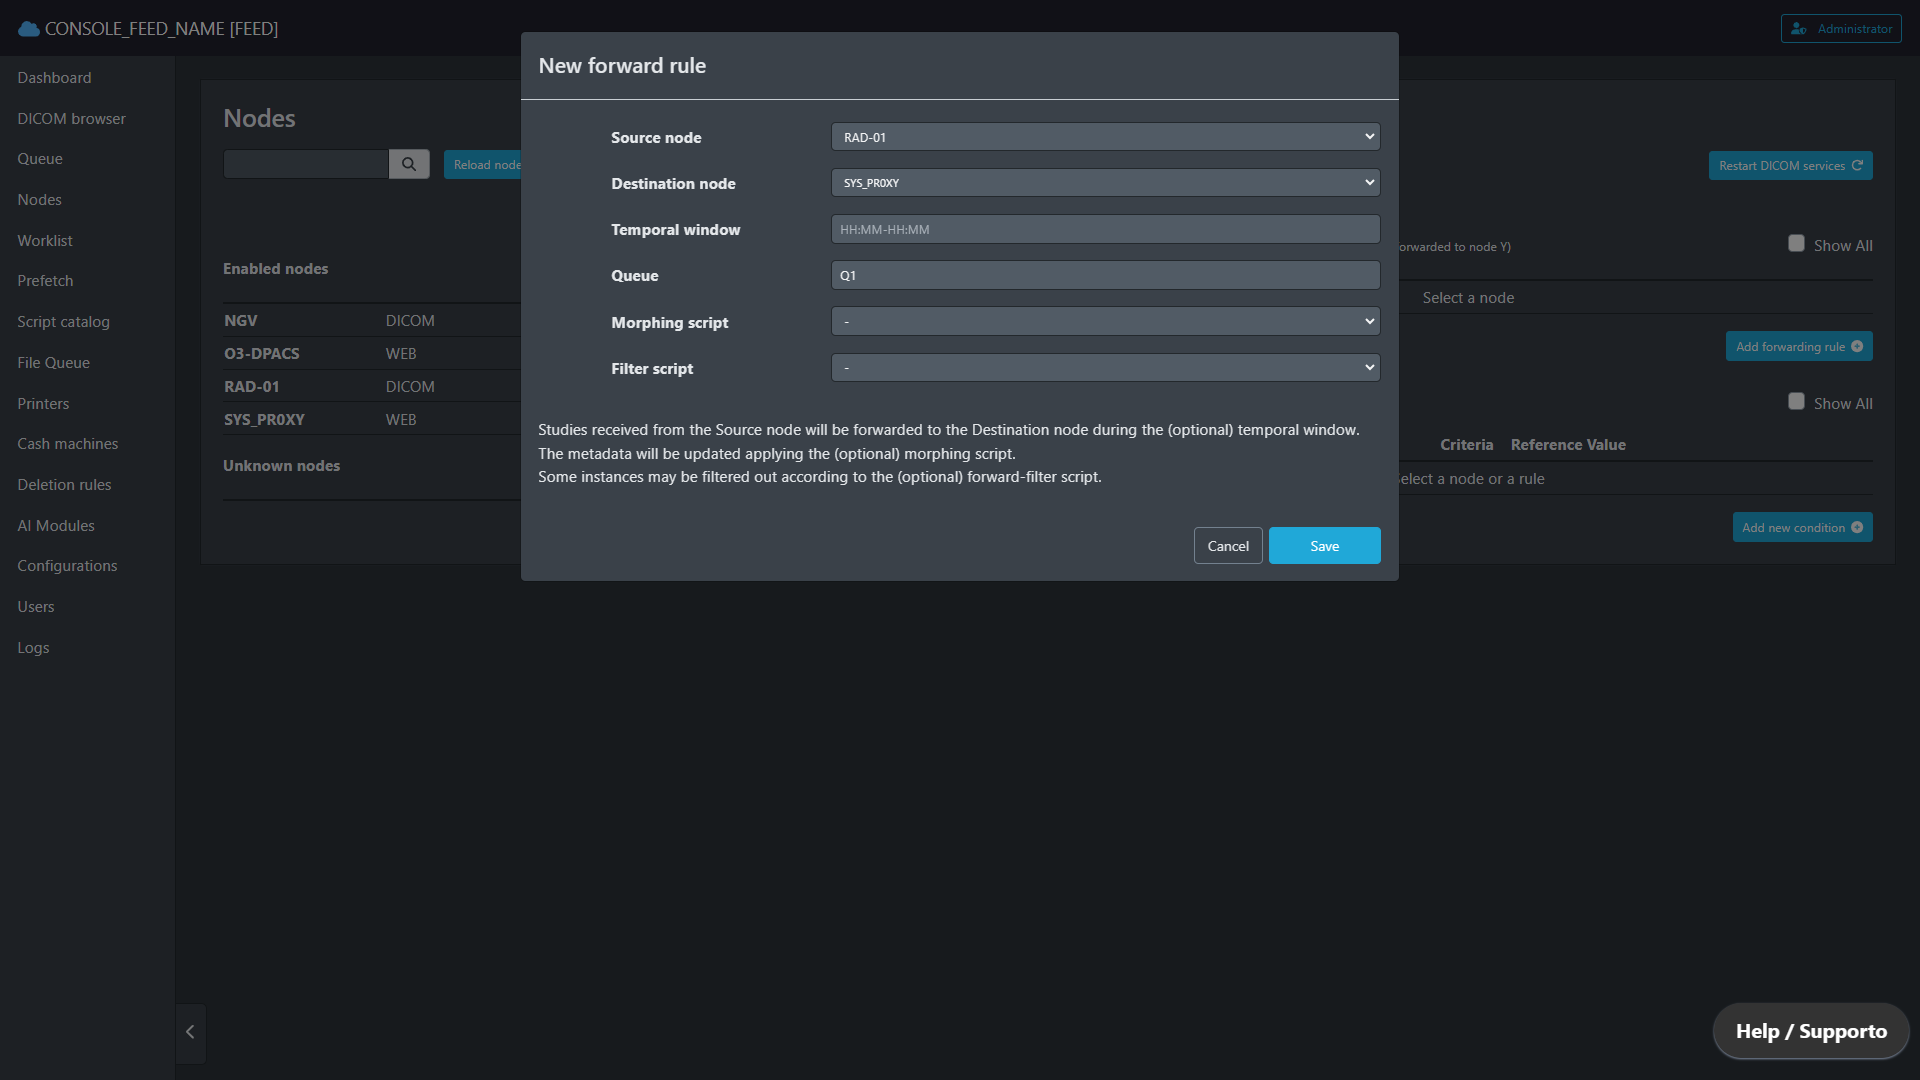
“New forward rule” popup
Please note that if the “Forward to” option was specified during the configuration of a new DICOM node, a forwarding rule for that node will be automatically created and displayed in the “Forwarding Rules” list.
Configuring a deletion rule
By default, the FEED system is configured to automatically delete exams after 30 days from the storage.
This option can be modified or disabled on the “Deletion rules” page by clicking the wrench icon next to the deletion rule named fallback.
By clicking the “Add new deletion rule” button on the “Deletion Rules” page it is also possible to configure a new deletion rule in order to delete exams received from a particular DICOM node.
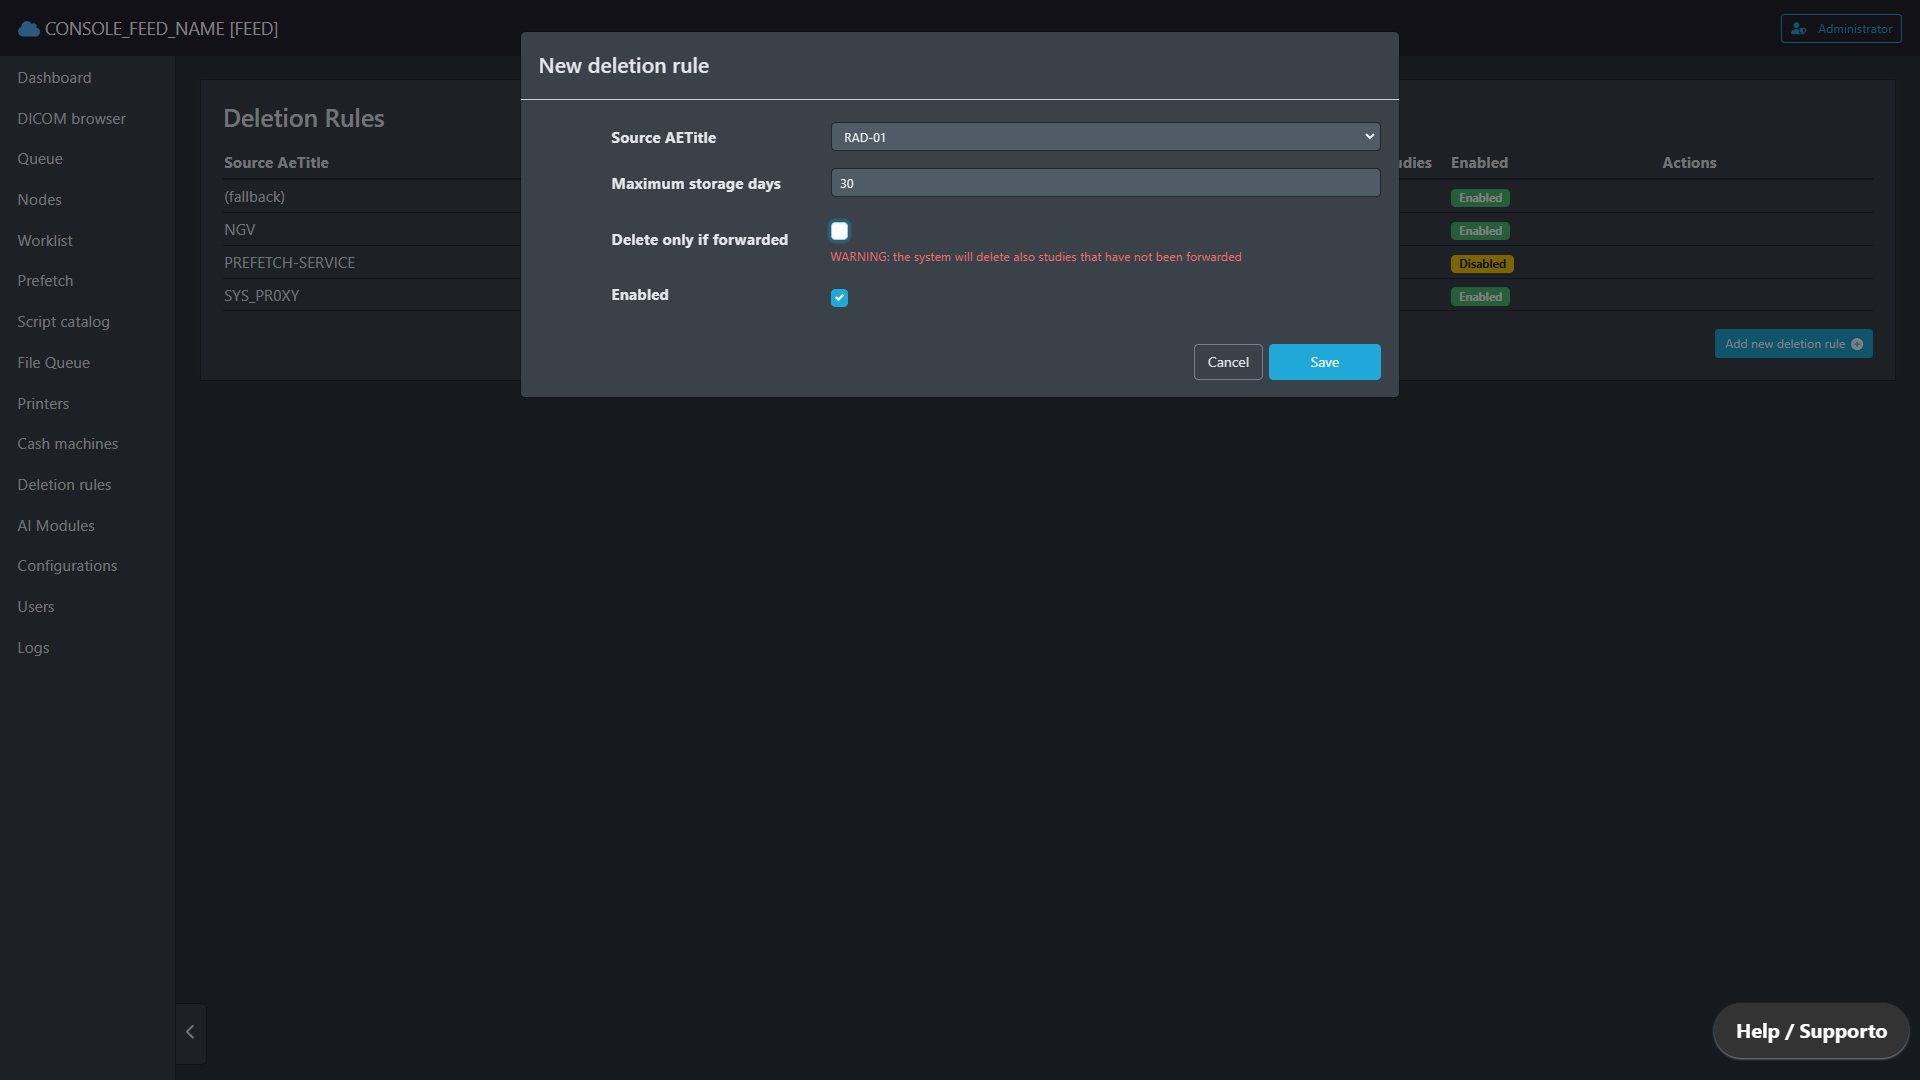
“New deletion rule” popup