VIEW configuration
To access the VIEW interface, open a web browser and visit the site using {IP}:{port}.
Unless otherwise specified in the Docker Compose, VIEW responds on port 8181.
Licence Activation
When accessing the system for the first time, the licence must be activated. Follow the instructions displayed in the VIEW interface to download the digest file and upload the provided licence.
DEMO licence
To request a DEMO licence, fill in the following form: New DEMO licence request.
Please note that, unless otherwise agreed, the DEMO licence will expire 30 days after activation, following which the system will no longer be accessible.
In case of need of further information, please contact partner@o3enterprise.com.
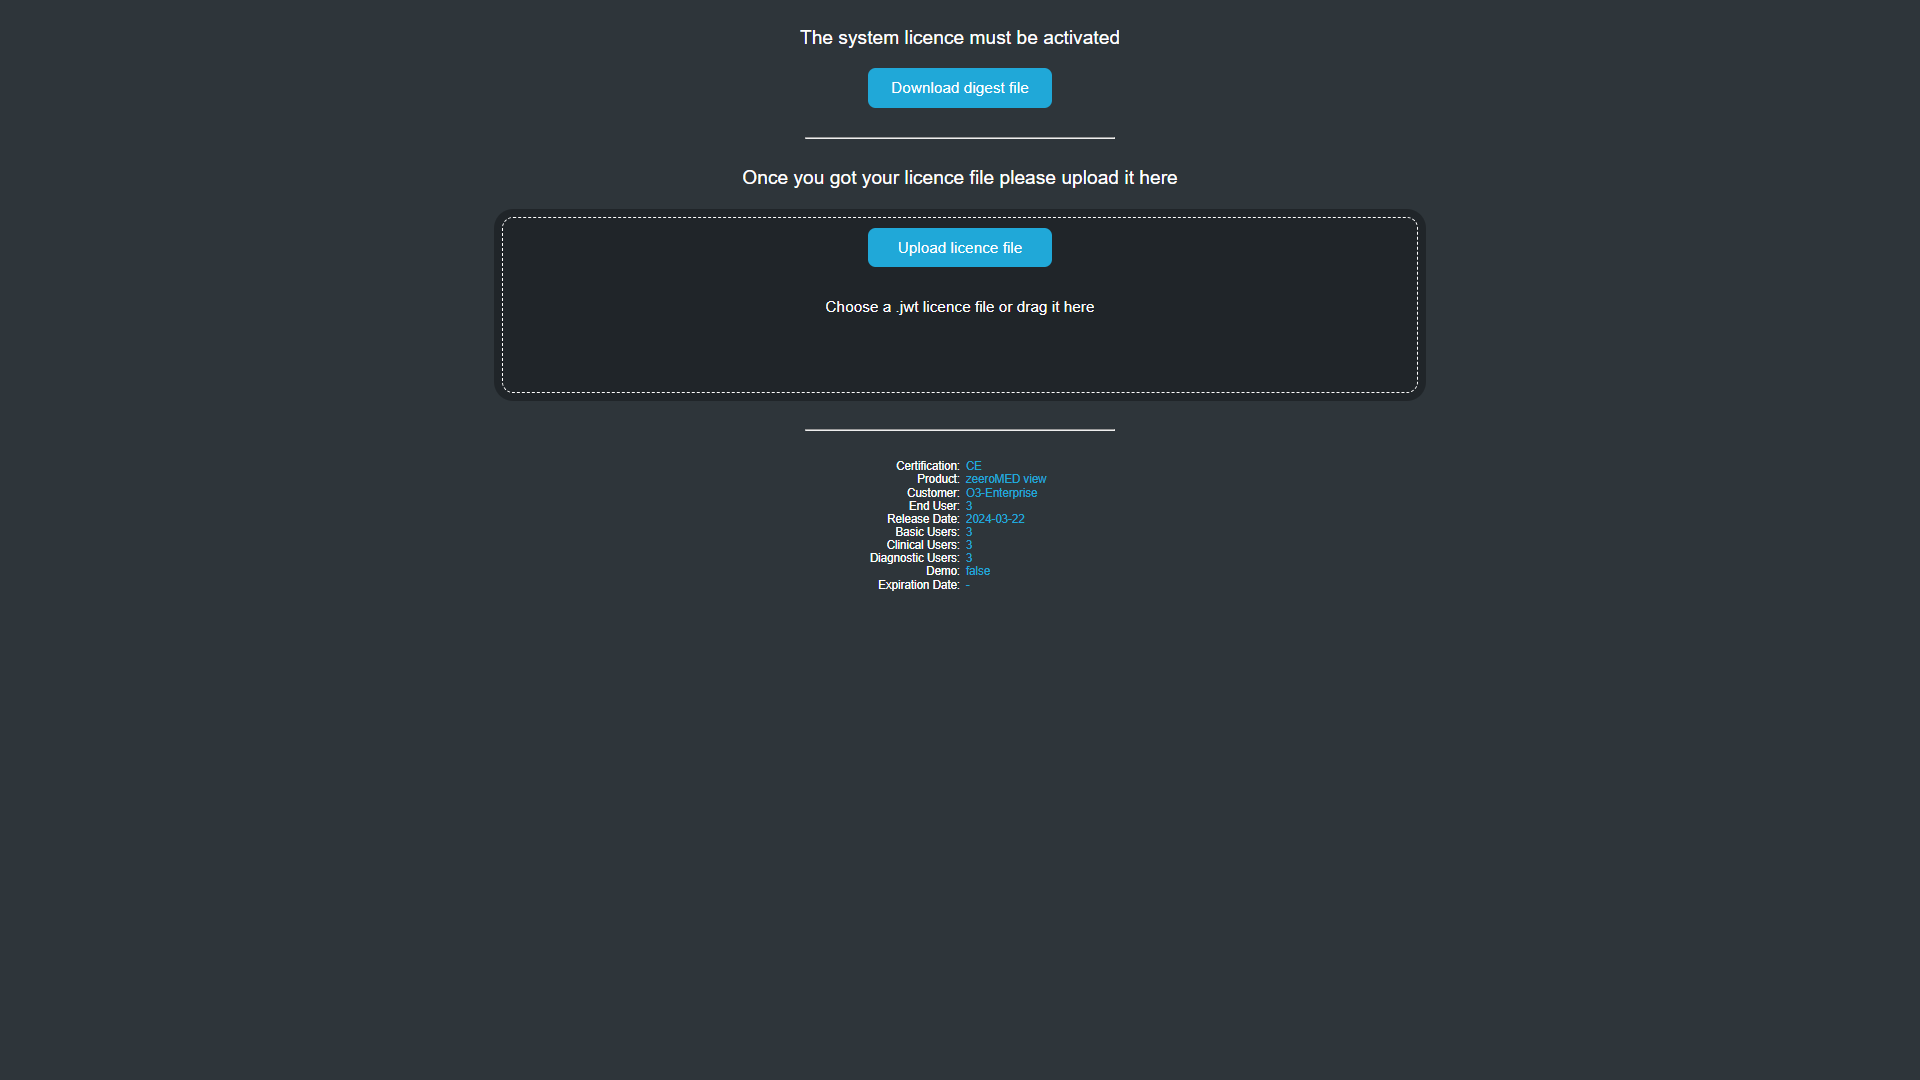
VIEW’s interface for licence activation
System Setup
After the licence is activated, a setup page is automatically displayed asking for the Administrator user's password, the working mode, and whether a multitenancy architecture is desired.
Working mode options include:
STORE: choose this option if it is intended to use the PACS component as the integrated storage. Select the Multitenant checkbox if it is intended to use a multitenancy architecture for the PACS.
FEED: choose this option if it is intended to use the FEED component as the integrated storage.
STANDALONE: choose this option if it is intended to open images located in the filesystem. Refers to VIEW APIs | Access-Token-API-(POST) for further details.
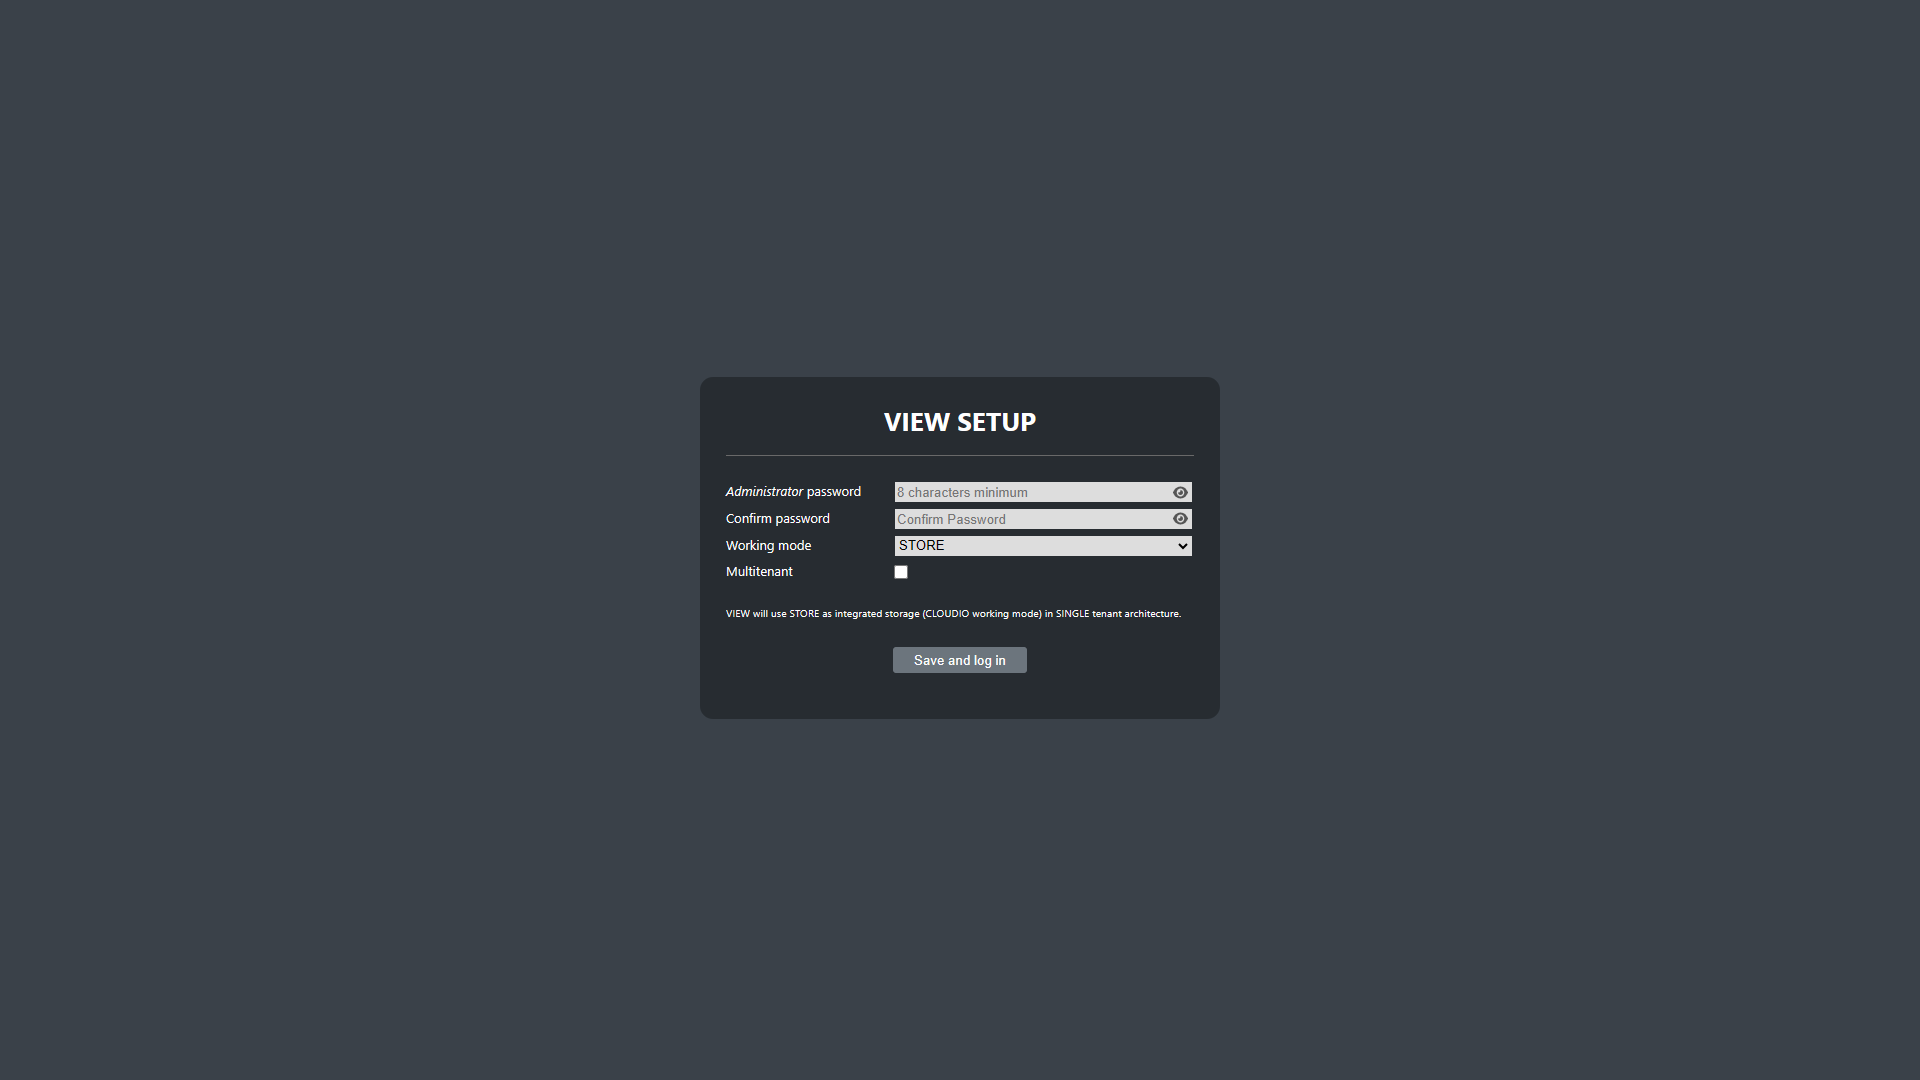
VIEW Setup page
After saving the setup, the application will redirect you to the login page. Log in to the system as Administrator using the password previously set through the setup page.
Initial configurations
The Administrator user is authorized to access the VIEW management area to configure several system options. To open the Management area, click on the gear icon from the VIEW interface or navigate to the URL {ip}:{port}/ngv/management.html.
Setting the URL for storage
If the working mode is set to STORE or FEED, the value of the StorageUrl parameter, available in “NGV_CONFIG”, must be properly set depending on whether DICOM C-STORE protocol or DICOMweb STOW-RS is to be used for storing DICOM files in the storage system.
Use DICOMweb STOW-RS for multi-tenant installations, otherwise use DICOM C-STORE.
DICOM C-STORE
dicom://{calledAETitle}:{callingAETitle}@{host}:{port}Examples:
STORE working mode:
dicom://PACS_AET:NGV@pacs:4568FEED working mode:
dicom://FEED_AET:NGV@feed:4568
STOW-RS
http(s)://{hostname}/{servicePath}/studiesExamples:
STORE working mode:
https://PACS_hostname/o3-dpacs-wado/stowRsListener/NGV/studiesFEED working mode:
https://FEED_hostname/stowrs/NGV/studies
If web services relative to the StorageUrl configuration require an Authorization header, set it as the value of the StorageAuthHeader parameter available in “NGV_CONFIG”.
Please note that all the examples above assume that the DICOM node NGV has been added to the PACS or FEED system. For further details, refer to PACS configuration | Add-a-DICOM-node or FEED configuration | Configure-a-DICOM-node, respectively.
Changing the working mode
The working mode set in the Setup page can also be modified from the Management area by changing the value of the WorkingMode parameter available in “NGV_SYSTEM_CONFIG”. Please note that in the “Management” area the CLOUDIO label is the alias for the working mode STORE.
Remember to reboot the system to apply the changes.
Managing API Keys
In the “API_KEY” section under the “OTHER” button, it is possible to create and manage the API keys used for authenticating and authorizing requests to the VIEW APIs.
Please note that when a new API Key is created, the token will be displayed only once in a confirmation popup. Store it securely; otherwise, it will not be possible to retrieve it later.
Additional configurations
Searching exams from remote DICOM nodes
VIEW allows users to search exams on DICOM nodes that differ from the integrated storage. To enable this feature, activate SHOW_REMOTE_NODES from “NGV_GUI_CONFIG”.
For single-tenant environments, it is also possible to set the VIEW to always search for exams on a configurable DICOM node. Activate USE_SHADOW_NODE from the “NGV_GUI_CONFIG” and add the desired DICOM node in the OTHER/NODES section, enabling the SHADOW option.
Setting up multitenancy
WARNING
Before setting up multitenancy, ensure that PACS has been properly installed and configured for a multitenancy architecture.
For further information about multitenancy, refer to the PACS and VIEW multitenancy page.
The multitenancy option set in the Setup page can also be modified from the Management area by changing the value of the MultitenancyEnabled parameter in “NGV_SYSTEM_CONFIG”. Set this parameter to true to enable a multitenant architecture, and to false otherwise.
Remember to reboot the system to apply the changes.
To add a new tenant, access the Management area of the admin tenant and click on the “ADD TENANT” button in the “TENANTS” section, available when the multitenancy is enabled. Afterward, a licence for the newly created tenant must be activated. Follow the instructions displayed in the interface to download the digest file and upload the provided licence.

“TENANTS” section of the admin tenant.